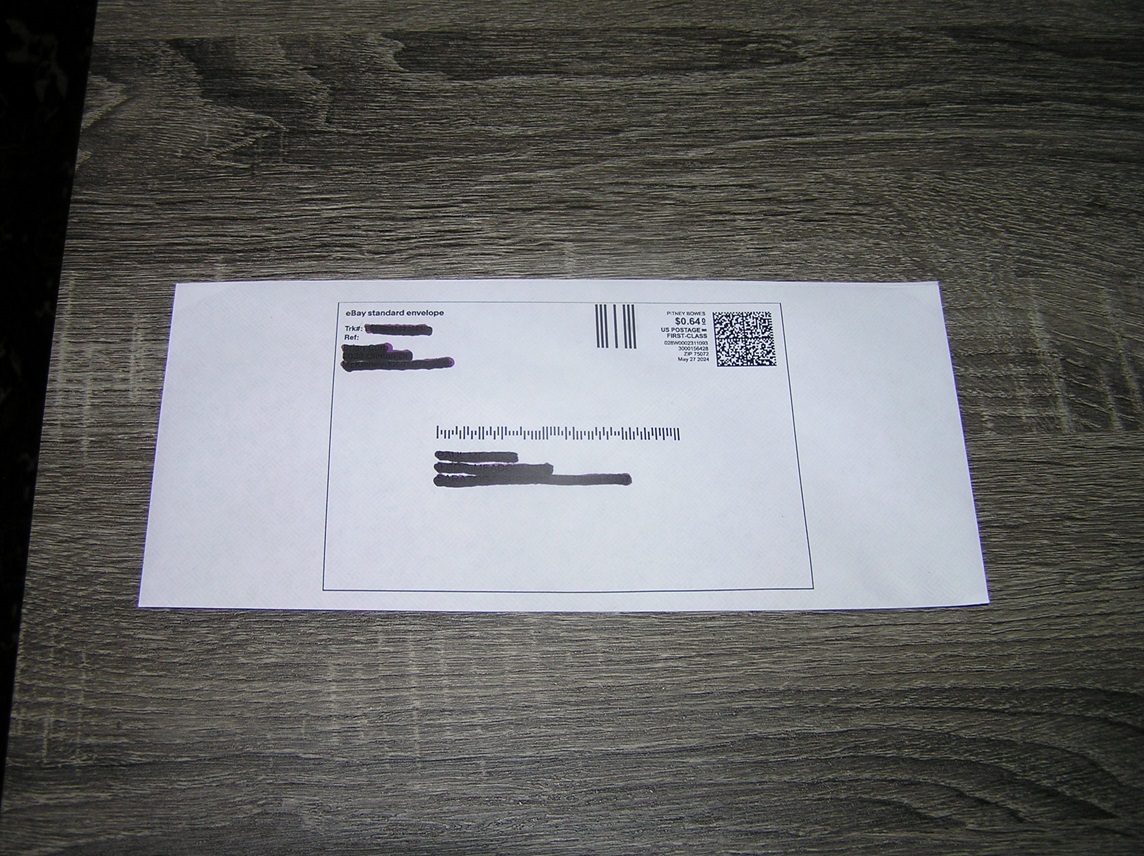
If you sell low value Sports Cards, Patches, Stickers, or a handful of other categories that qualify for the eBay Standard Envelope (ESE) this guide is likely for you. The general advice from Reddit and YouTube videos is to use a thermal printer for a peel and stick label over something like a #10 plain white envelope. Other advice starting up is print the label on a 8″ x 11″ standard piece of white paper and trim and attach via tape.
The problem with these methods is that even if the weight and thickness is correct and letters would qualify as machinable. You are going to draw attention to your letters, as many have reported issues with the post office getting ESE’s outright rejected, asking for a non-machinable surcharge or worse charging the buyer at the final destination.
One of the major advantages of the ESE is basic tracking that comes with the service. In order for the tracking to work these envelopes must be machinable meaning they have enough flex to be able to go through the USPS high speed letter processing machines. This tracking ties into the Informed Delivery Service by USPS. For those of you that use this service its where you get scans of the letters from USPS emailed to you daily, you may notice every once in a while there is a template image that says this piece of mail cannot be displayed. Well, that is generally something that is going to be non-machinable. Thus to effectively use the ESE, you can’t send something that is non-machinable it won’t get tracking and will likely get returned for a non-machinable surcharge.
When first experimenting with the ESE, I couldn’t figure out why it was so hard to just print a label on a plain white envelope. After a couple hours of messing with the settings I have figured it out. Please note all this was done on a desktop computer using Windows. I do not have a solution for Mac users or anyone trying to use their phone. The goal of printing on a plain white envelope is to not have letters using this program stand out which in my opinion taping or a affixing peel label absolutely does.
Step 1: Find Your Order and Select Print Shipping Label
The first step is really a no brainer. After logging into your account and find the order you wish to print a label for.
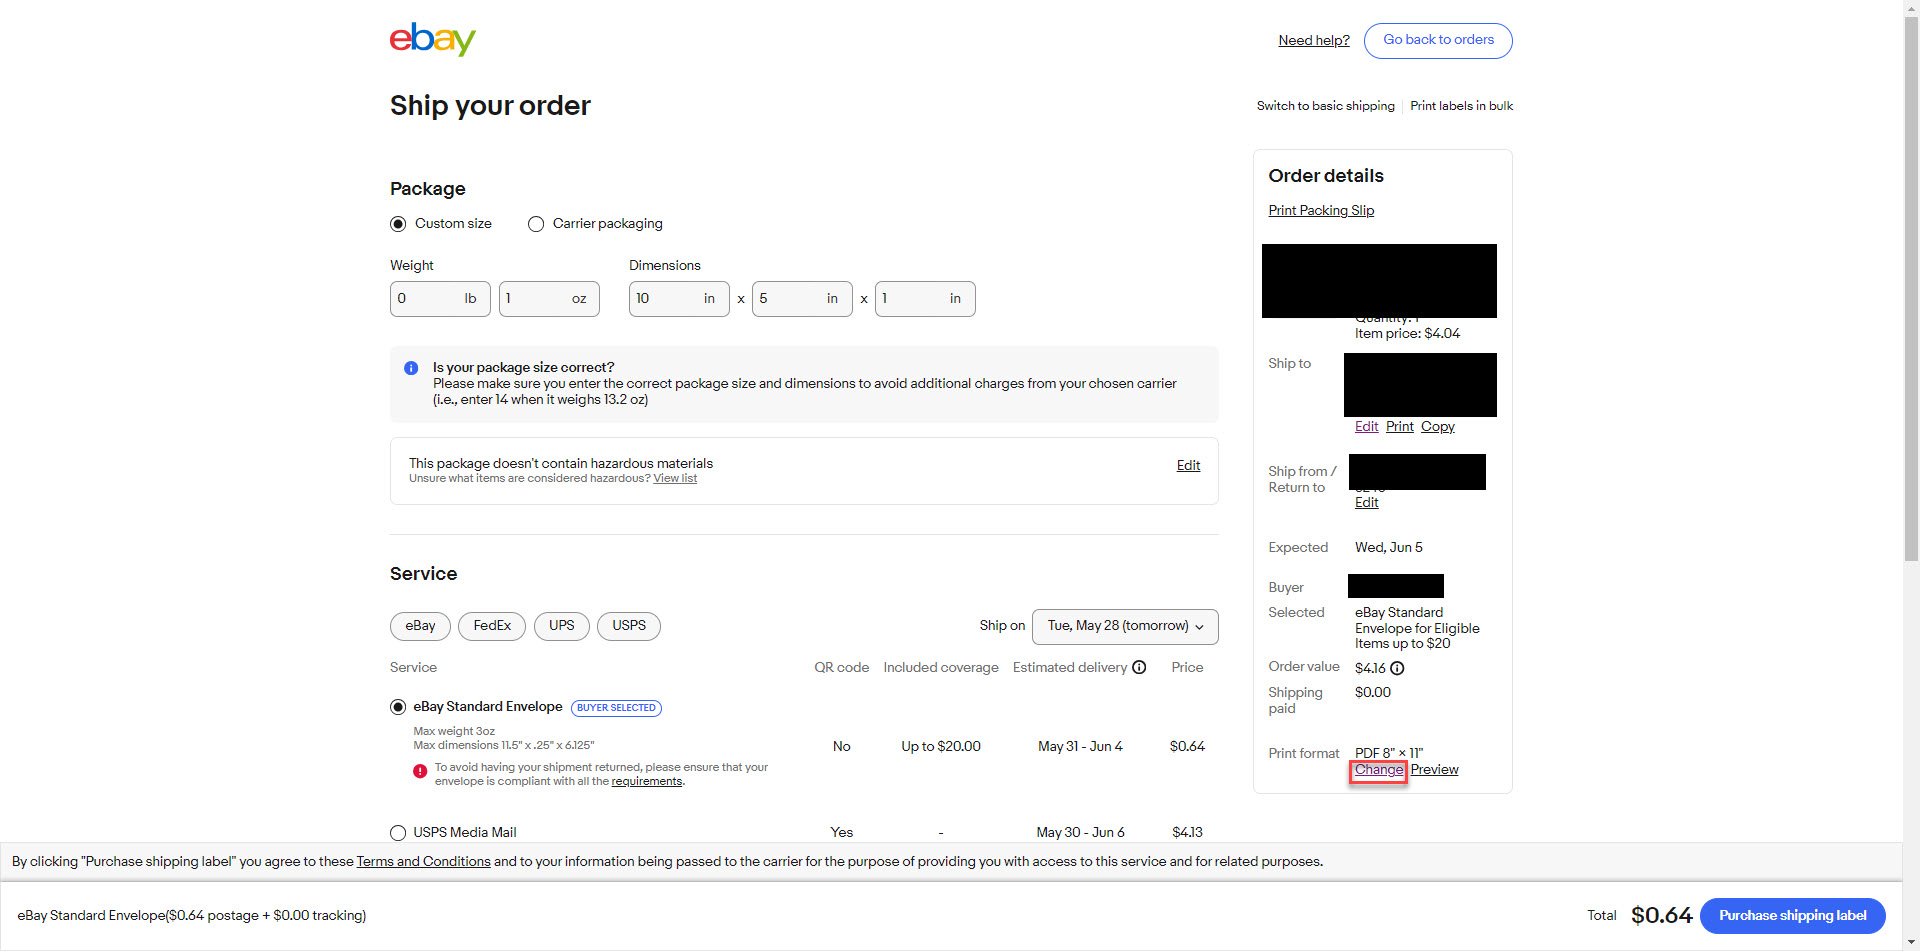
Step 2: Change the Print Format at the Bottom
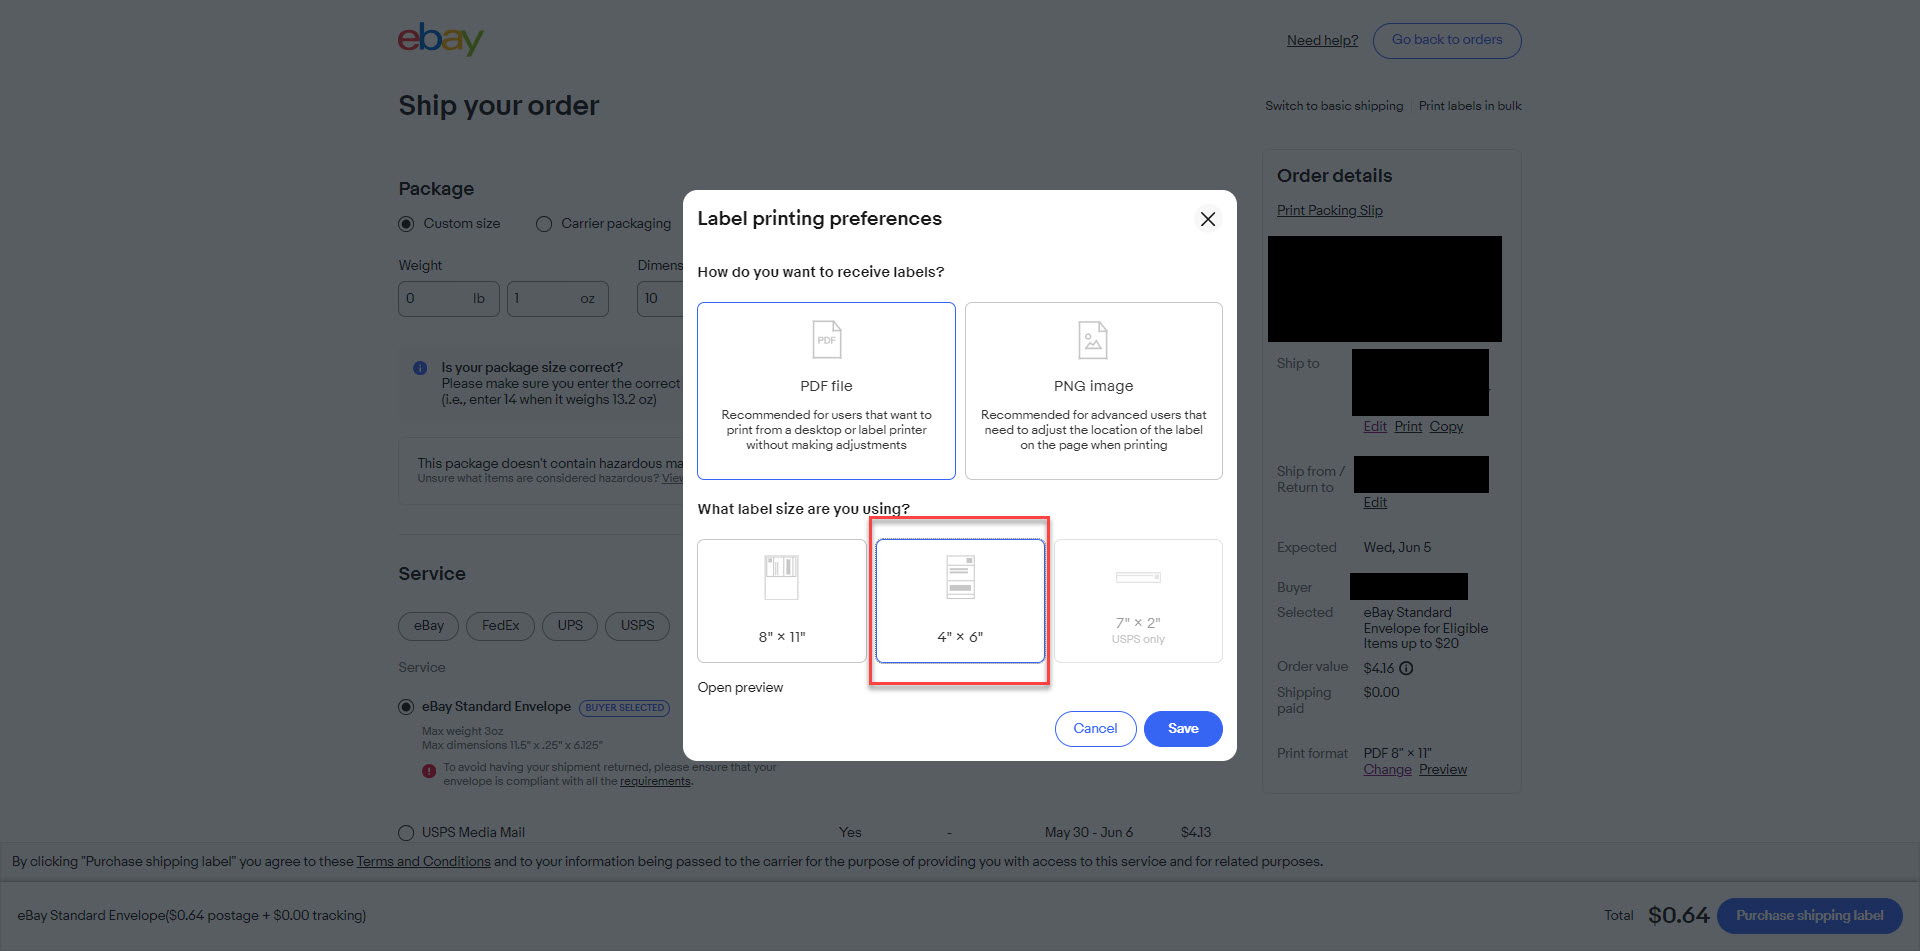
This is a two step process where you change the print format section. On the second screen you will want to change it from your regular 8″ x11″ letter size to the smaller 4″ x 6″ option. Then once all the other details are sizing details are filled out and the eBay Standard Envelope option is selected as the shipping method you can purchase the postage.
In the bottom right corner select “change” in the print format section.
Then select 4″ x 6″ as the label size.
Step 3: Change Your Pinter Settings
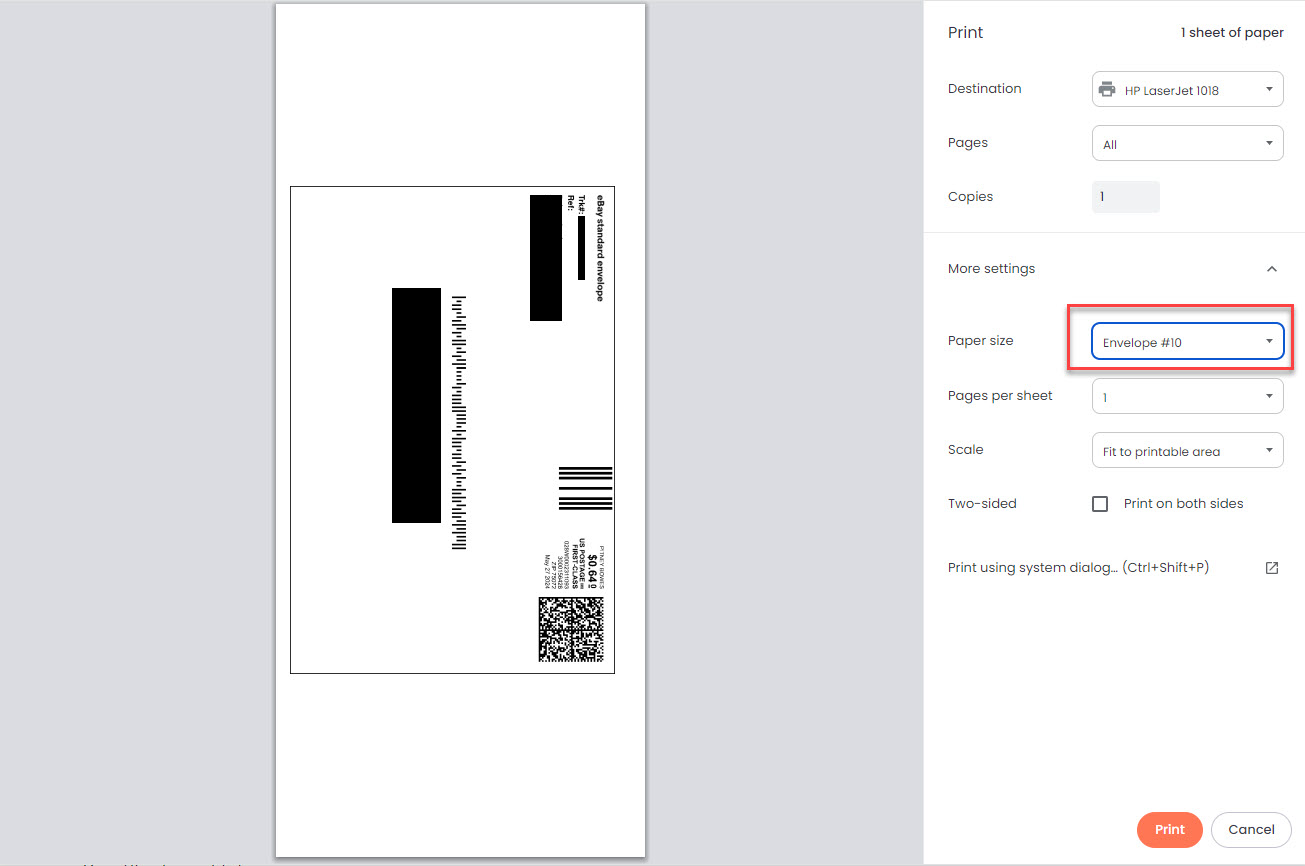
When at the print screen update the paper size to the #10 Envelope or whatever size you may be using. Depending on the previous settings you may need adjust the scale option to better center the label.
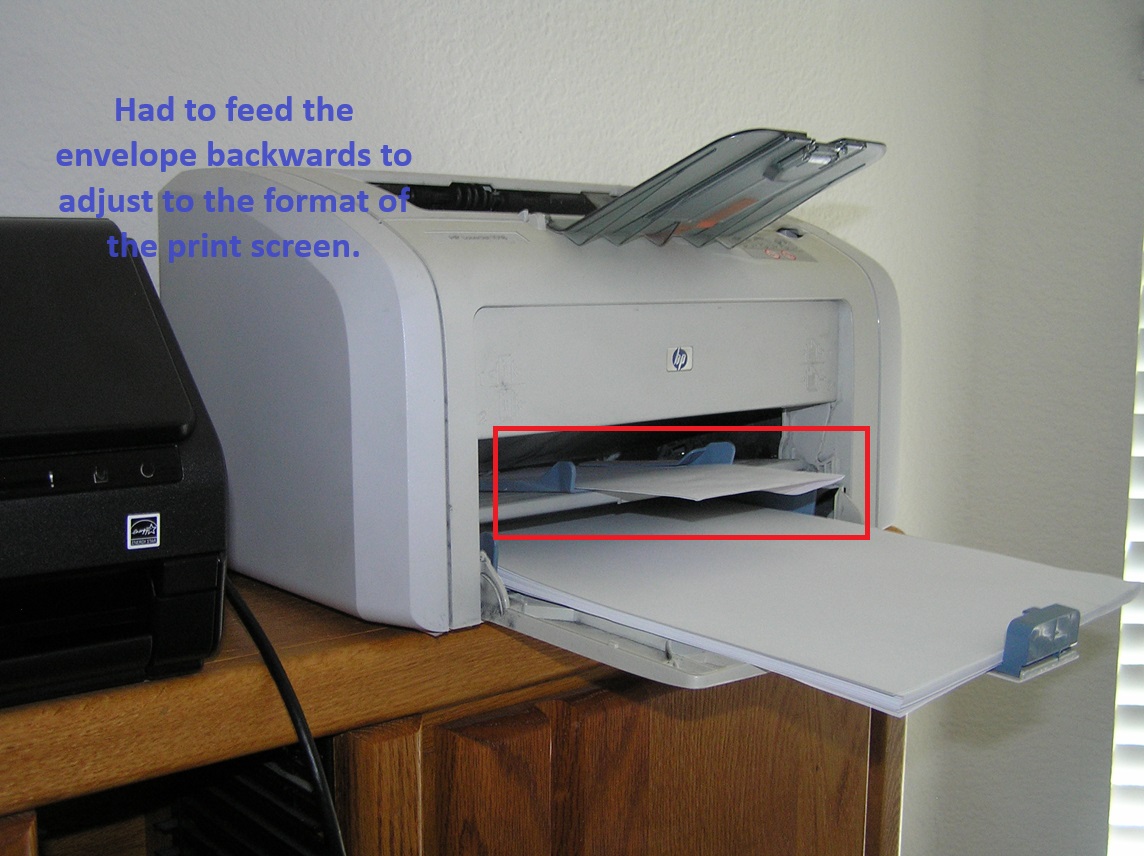
Please note that because of how the label interface is setup you may have to backwards feed the envelope. For whatever reason this method prints upside down from normal letter printing.
Step 4: Pack and Ship
Now your label should be printed directly to the letter. You can pack and ship your letter.
Conclusion
The purpose of the eBay Standard Envelope for most sellers is to get the basic tracking that comes with the service. This helps satisfy eBay’s shipping performance metrics and deter some item not as received claims. Pre ESE many sellers would just ship items with no tracking in a plain white envelope with stamps and if it was a little bit to thick or didn’t bend people would use a non-machinable Butterfly Stamp.
Since we know that ESE letters must be machinable and run through the high speed USPS letter processing equipment. The goal should be to make your ESE letters not stand out which attaching a peel and stick label or taping paper cutout to a plain white envelope absolutely does. Thus, printing directly on the envelope is the best way in my opinion to not have your letters stand out and just get in with the regular flow of the mail. Hopefully this helps someone struggling with this process. I know it took me a couple hours of tinkering to figure out how it might even be possible.
